Category Archives: Social Media

All things internet! We’re in your blogs and on your Facebook and in your Tweets!

Enhance your homeschool science class with MEL Chemistry

Disclaimer: MEL Chemistry sent Nichole a starter kit to review here at Butterscotch Sundae. All opinions are Nichole’s own, and Nichole is paying for subsequent kits.

“Can we blow stuff up?”

This is, naturally, a question one frequently fields when teaching a middle school chemistry class, and I anticipated that when I started planning our semester. So I started scouring Pinterest for experiments that walk that fine line between safe and exciting, and we started the class.

Things were going pretty well. The experiments were probably closer to the “safe” end of the spectrum than the kids had hoped for, but I felt OK about it.

And then one evening as I was browsing Pinterest, and a post about MEL Chemistry caught my eye. “Exciting experiments delivered to your door every month”? I clicked and looked around, and I was sold.

They were equal parts thrilled and nervous to wield the fire in the carbon snake experiment.
I contacted the company and explained that I was interested but wasn’t sure it would work in a class setting, and they said they’d send me the first kit to try out. A couple days later it arrived, and I was and am so impressed with it. The starter kit includes a flask and a beaker; a VR viewer; a solid-fuel stove; safety glasses; and a macro lens for your cell phone camera. They also send you two kits with the starter set, and each kit includes two experiments.

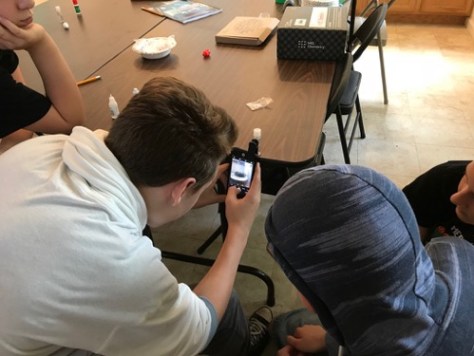
The kits include full, clear instructions and most everything you need to perform the experiments. MEL Chemistry sends enough of the reagents to be able to do each experiment twice. With 7 kids in our class, though, that’s not quite enough for everyone to do every experiment. It’s working well for us to run the experiments as Lab Demonstrations, with two kids doing the work and the others either observing or working as photographers and videographers.

The included camera phone lenses have proven to be popular.

So far we’ve made fiery little carbon snakes and a foam eruption from the Chemistry of Monsters kit and a wee little hedgehog from the Tin kit. The kids enjoyed the carbon snake and the foam eruption a bit more than the tin and zinc “hedgehog” — because of the fire and movement — but I thought the formation of the spikes on a little ball of zinc was pretty incredible.

The carbon snake was very cool and somewhat creepy, though.

MEL Chemistry has made 80 virtual reality lessons, and the ones I was able to check out were phenomenal. The atom structure and electron orbital lessons were particularly great for helping the kids visualize a pretty esoteric concept. With the kits and the virtual reality lessons, I think this could be a complete chemistry curriculum. Unfortunately, the cost of the full VR license — $499 for 10 devices for a year — is far out of my price range. Some of the VR content is available just by downloading the MEL Science app, though, and the lessons available are well worth the download.

A MEL Chemistry kit subscription is $35 per month for a single set of experiments or $50 per month for two sets each month. I don’t think the kits alone would be sufficient for a full year of middle school science on their own, but they sure are a fun complement to whatever chemistry curriculum you’re using. The glassware and other hardware is excellent quality, and I love that they include all of the chemical materials you need as well.

The only thing on my MEL wishlist (other than $500 for a VR license) is that it would be nice to be able to choose the order in which the experiments arrive so I could make sure they correspond to what the kids are learning that week. I’m going to subscribe even without that option, though, and I’m looking forward to seeing what lab demos MEL Chemistry drops on my porch over the coming year!

what we had there was a failure to communicate

Butterscotch Sundae Dot Com has been having issues accepting comments lately. I’m not sure how long the problem’s been going on, but it came to my attention when National Blog Posting Month started and a couple of people said, “Hey! I can’t comment on your blog.” But then when I asked some other people to try, they could comment and it was all very confusing. Then I figured out that people on mobile devices could comment but people on computers couldn’t, and I passed that on to my security people and they said, “Huh, that’s weird. Your comment system is rooty tooty dablooty[1]I didn’t understand what they said. and they only way we can figure out how to fix it is get a different comment system.”

So I installed Disqus, and I’m currently working on importing all of my not-Disqus comments over to the Disqus system, and that’s causing me headaches, too, because my blog is 12 years old and Disqus isn’t handling all that importing very graciously. I may have to do some more laborious behind-the-screens work to get things where they need to be, so things might get weird here for a bit.

Anyway, you ought to be able to leave comments from any internet-able device now. And I hope you do.

Footnotes

Footnotes
1 I didn’t understand what they said.

How the Ninja Coffee Bar won my heart

Disclaimer: SharkNinja sent Nichole products to review here at Butterscotch Sundae. No money changed hands, and all opinions are Nichole’s own.

I am a confirmed homebody, and as such I have a lengthy list of the Things I Miss When I’m Not at Home. Normally, the things at the top of that list are:

3. My bed.
2. My bathroom.
1. My fuzzy little angel and constant companion, Marsha T. Cat.

But things felt a little different when we were at my dad’s house for Christmas. I couldn’t put my finger on exactly what it was until I saw Dad making a cup of coffee. And I realized that the things I was missing most were:

3. My bathroom.
2. Making a fancy frothy latte with our new coffeemaker.
1. The furry bright star of my firmament, Marsha T. Cat.

I don’t drink a lot of coffee, but I do love a great kitchen gadget. And I have had a great time playing around with the Ninja Coffee Bar ever since the SharkNinja people sent it to me a couple of months ago.

The Ninja has completely replaced our Keurig, which we bought because Rockford is the only permanent occupant of our house who drinks coffee, and he only drinks one cup in the morning before he heads off to work. So it made sense for us to have a one-cup coffee system. Most of the time. Unless we had visitors who practically live on coffee, which happened more often than one might expect and led to us going through far more of those little cups than I would’ve liked.

Enter the Ninja.

The Ninja Coffee Bar uses regular ol’ ground coffee, and it comes with a reusable filter. You can make a full 10-cup carafe when you have highly caffeinated guests, or you can use the one-cup setting if it’s just your slightly bleary-eyed self. There’s even an extra-large cup setting and a travel cup setting, in case you’re a little more than slightly bleary eyed.

“But how do you make just one cup of coffee in a full-size coffee maker?” you may be asking. “It’ll splash everywhere!” The Ninja people thought of that, and it’s one of my favorite thoughtful little touches on the machine. You flip down a little built-in platform and put your cup on it, and the coffee goes straight into the cup without leaving little coffee splatters everywhere. So smart, those Ninja people.

It’s like a tiny patio for your coffee cup!

The Coffee Bar also features a built-in cubby to store the measuring scoop that comes with it, and there’s a slider you can pop into place to stop errant coffee from dripping onto the heating plate. It also has an array of settings so you can customize the strength of your brew, from Classic to Rich to the rather potent Cafe Forte.

But my very favorite thing about the Ninja Coffee Bar is — drum roll please — the frother. It’s a tiny, motorized whisk that’s attached to an arm that swings out from the side of the machine, and it makes me want to add frothed milk to everything.

My drizzling skills need some work.
I like to add a little flavored syrup to the milk, heat it up for a minute and then froth it for 20-30 seconds before adding it to a cup of coffee — usually brewed on the 4-ounce specialty setting, which makes an espresso-like brew.

So far I’ve made iced coffee, caramel lattes, cinnamon lattes, vanilla lattes and a mocha. My father-in-law said the iced coffee I made using the (you guessed it) iced coffee setting tasted just like the one he gets at his favorite chain coffee shop. That’s high praise from a guy who may be the world’s leading consumer of iced coffee.

The Ninja Coffee retails for right around $200, and it makes a mighty fine cup o’ Joe.